web_app_recon_ci-cd
🔍 Recon-as-Code: Passive Web Application Reconnaissance in a CI/CD Pipeline
This project delivers a fully automated Recon-as-Code pipeline for passive reconnaissance in web application environments. It combines GitHub Actions-based CI/CD automation, powerful reconnaissance tools, and a Flask-powered authenticated dashboard for visualized access to findings.
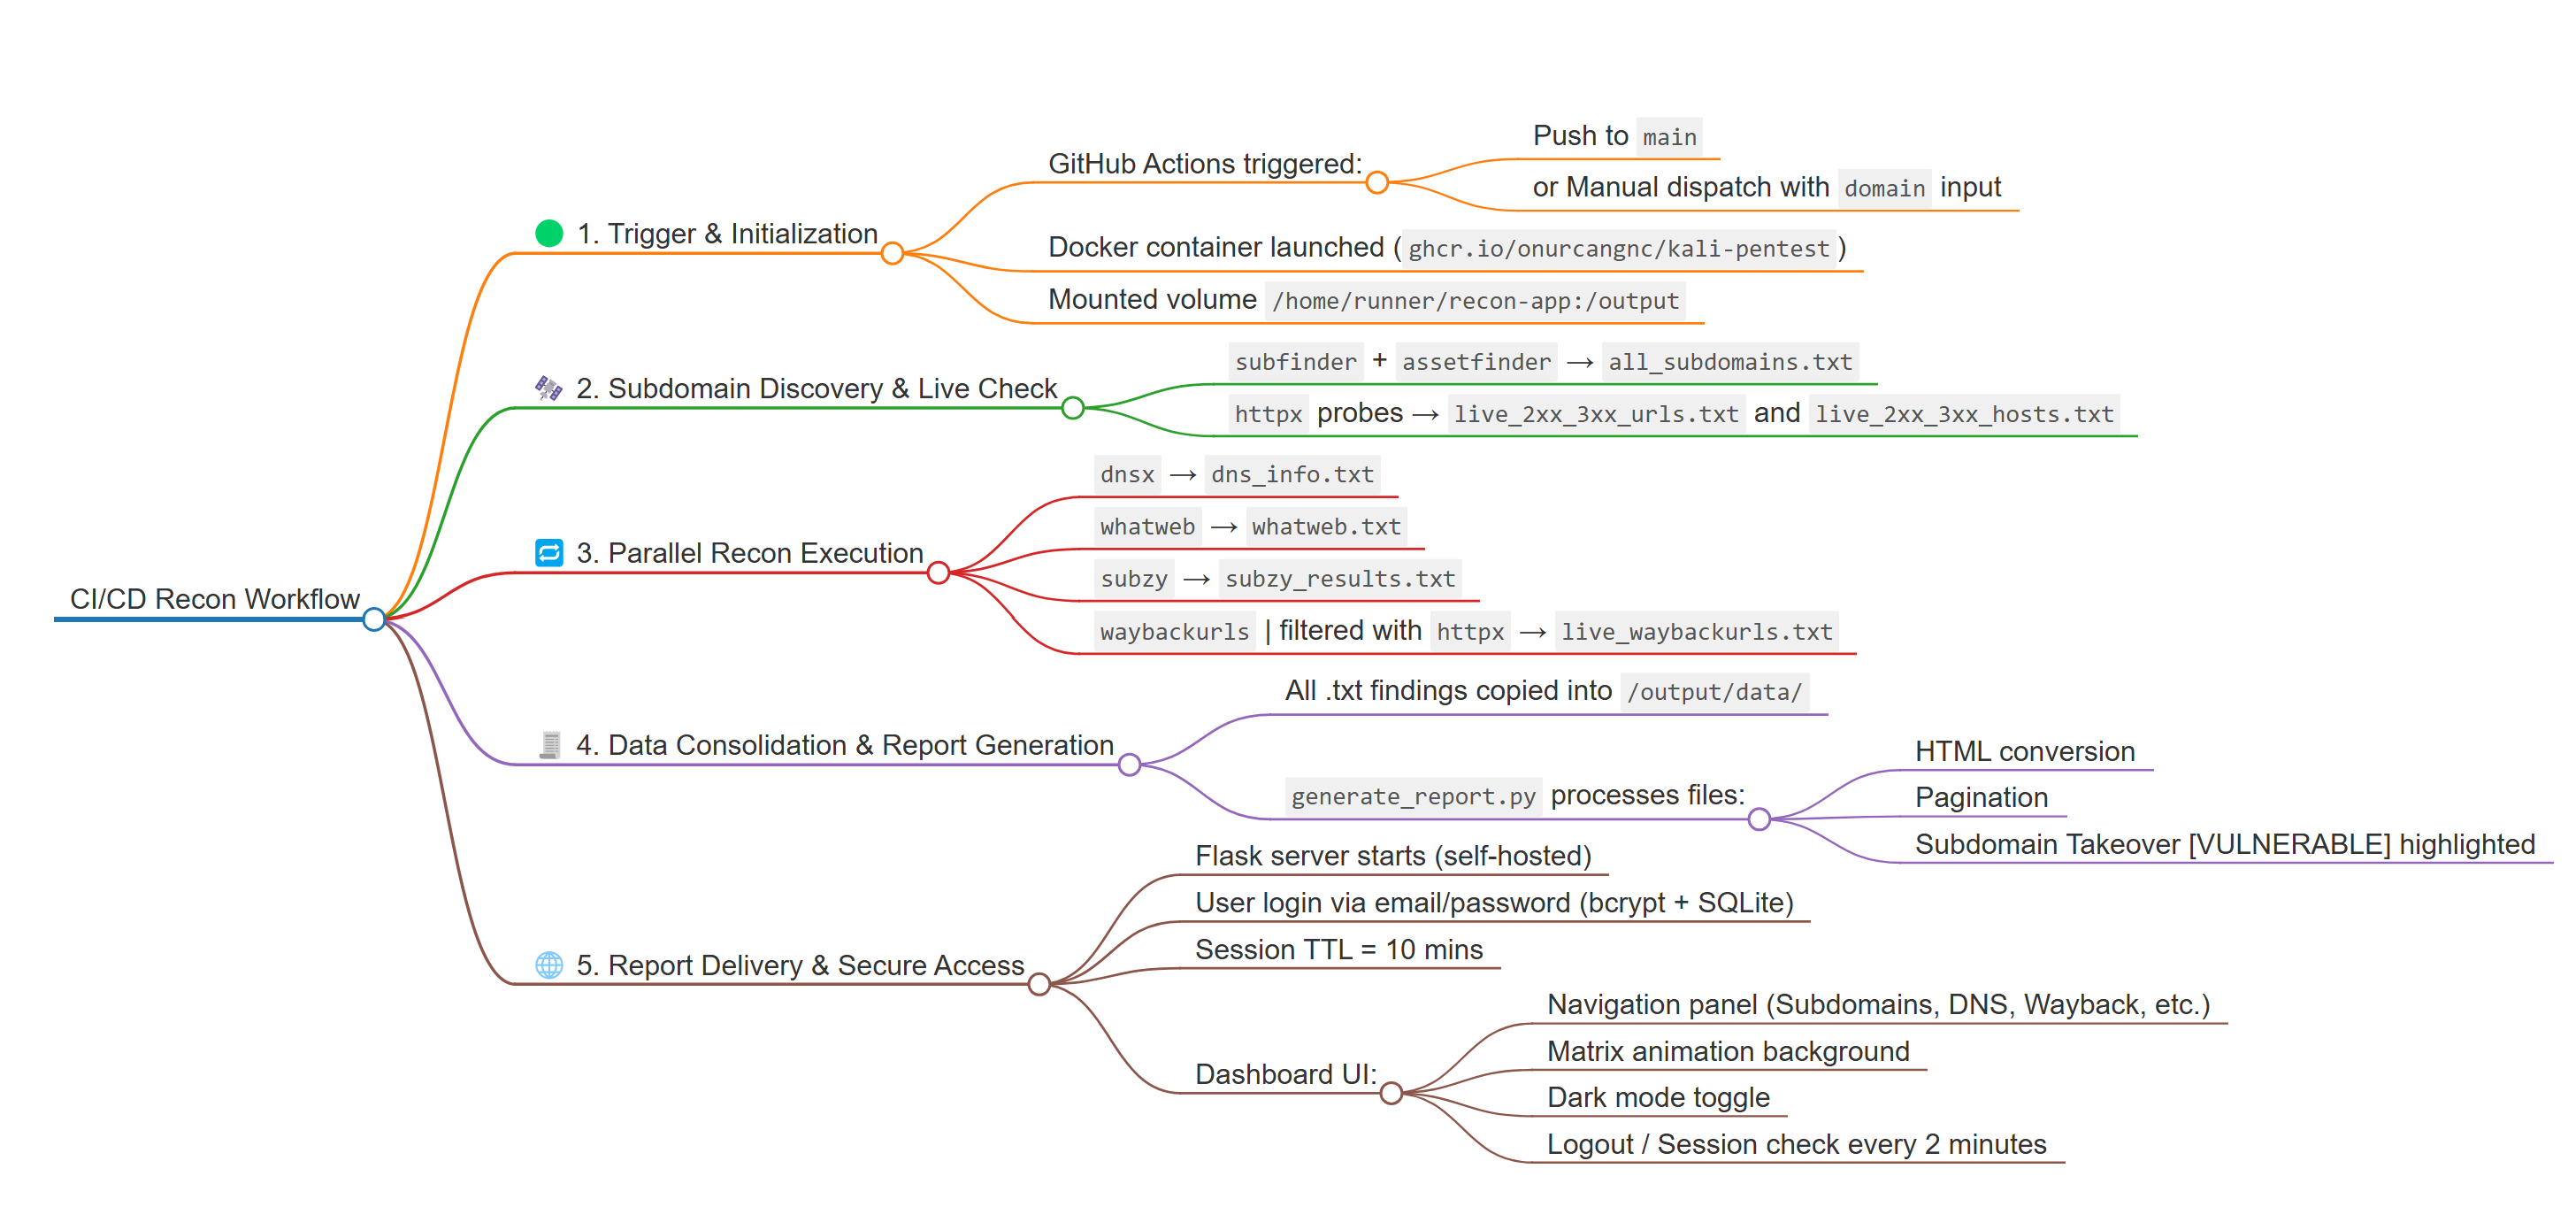
🧭 Pipeline Flow
To better understand the timeline and flow of this pipeline, you can explore the full visual representation below:
👉 📌 View the CI/CD Passive Recon Mindmap (Markmap)
Example Usage:
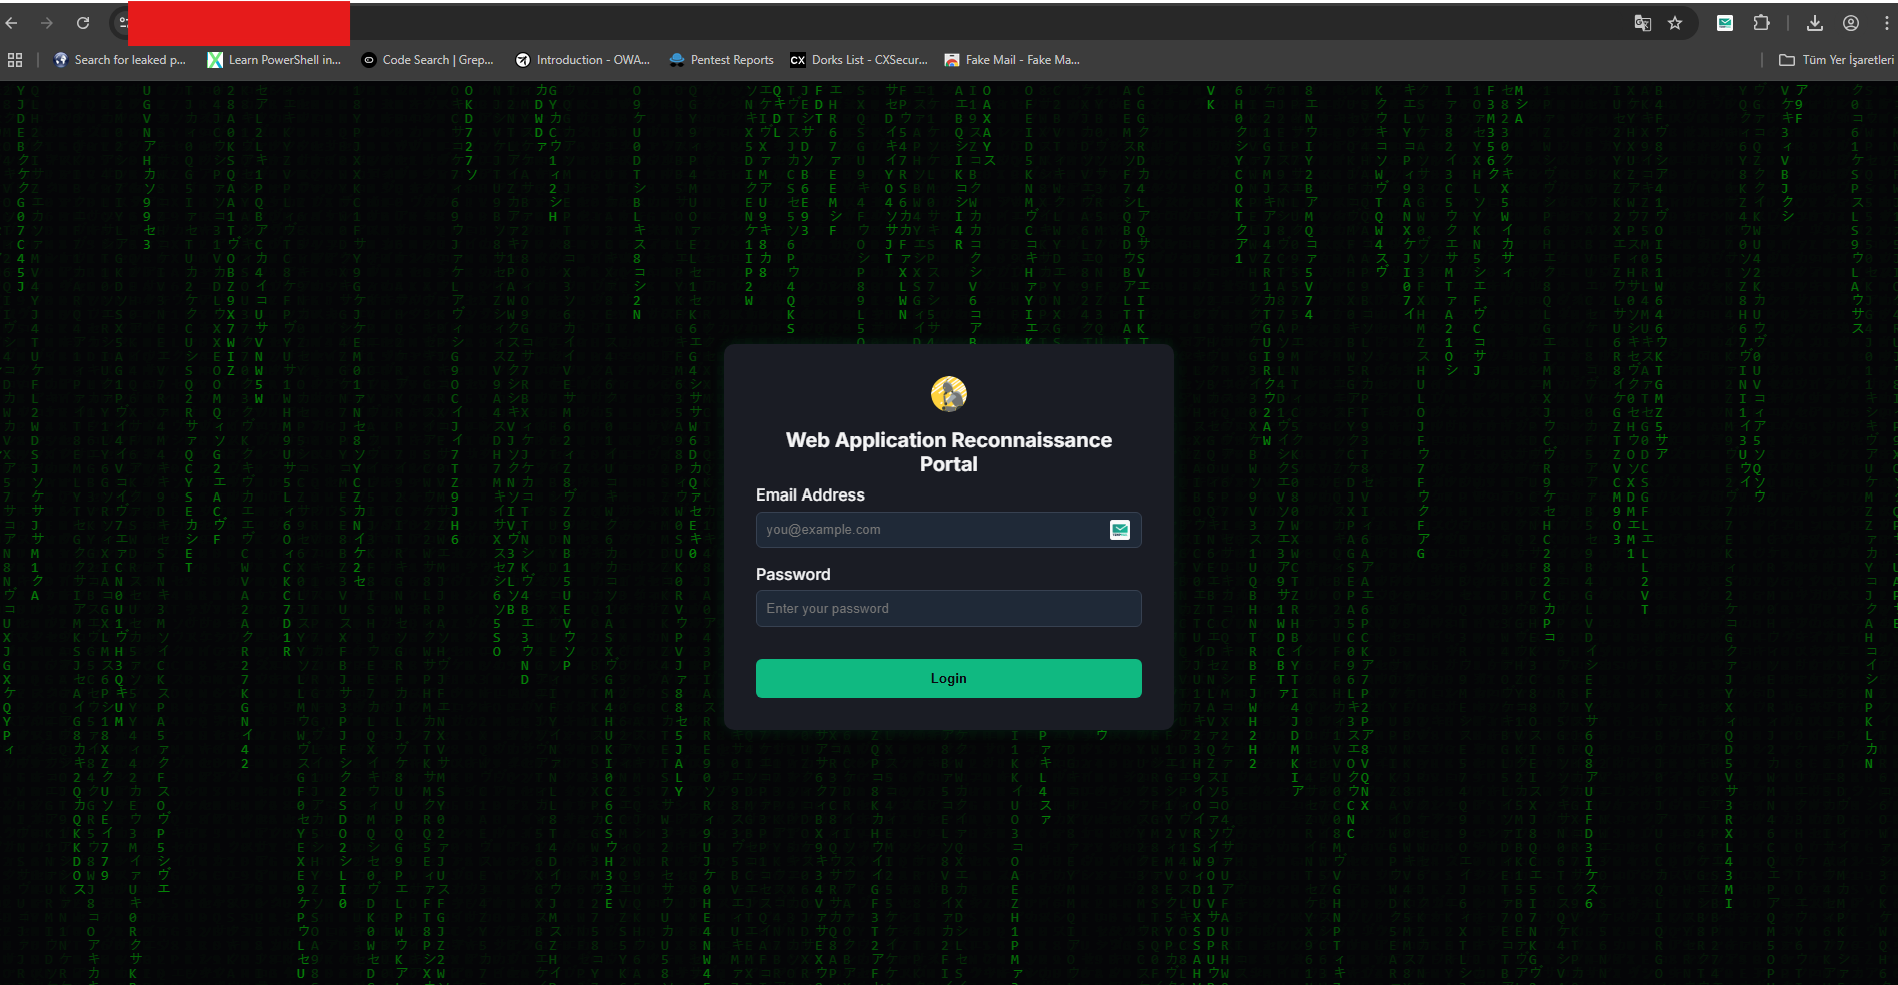
1) Login Page
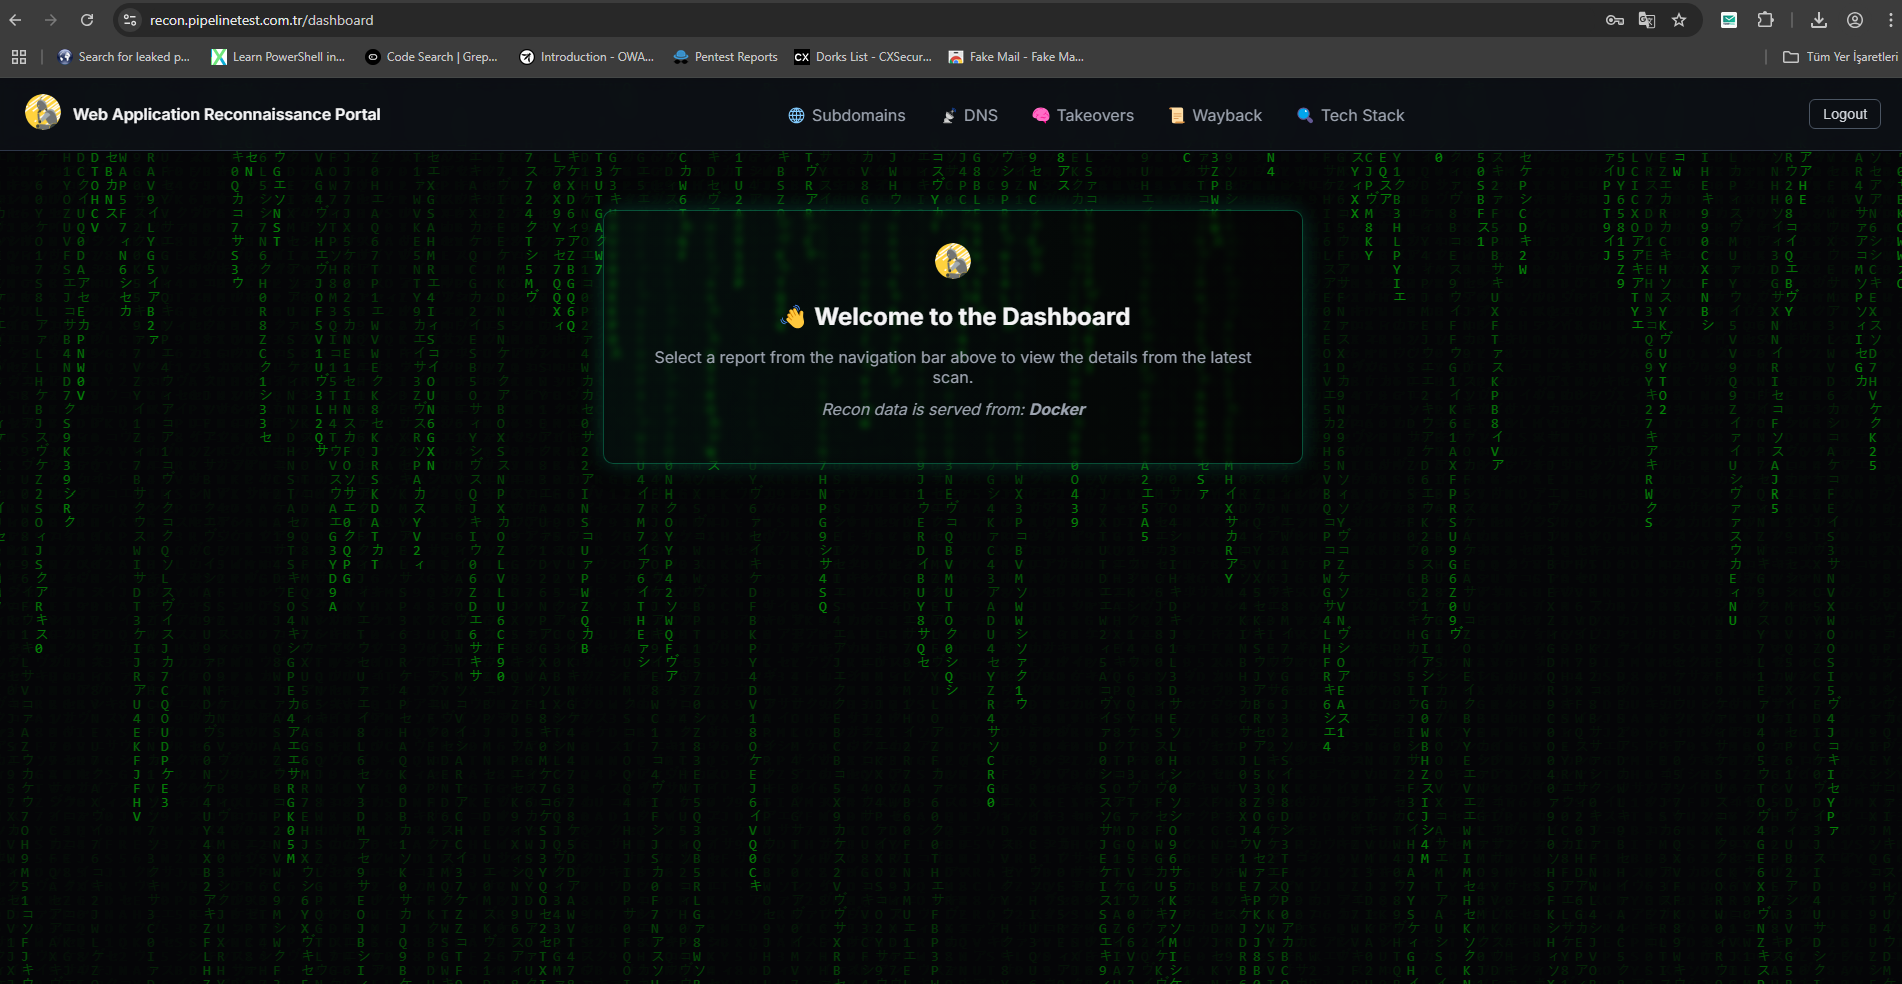
2) Dashboard Page
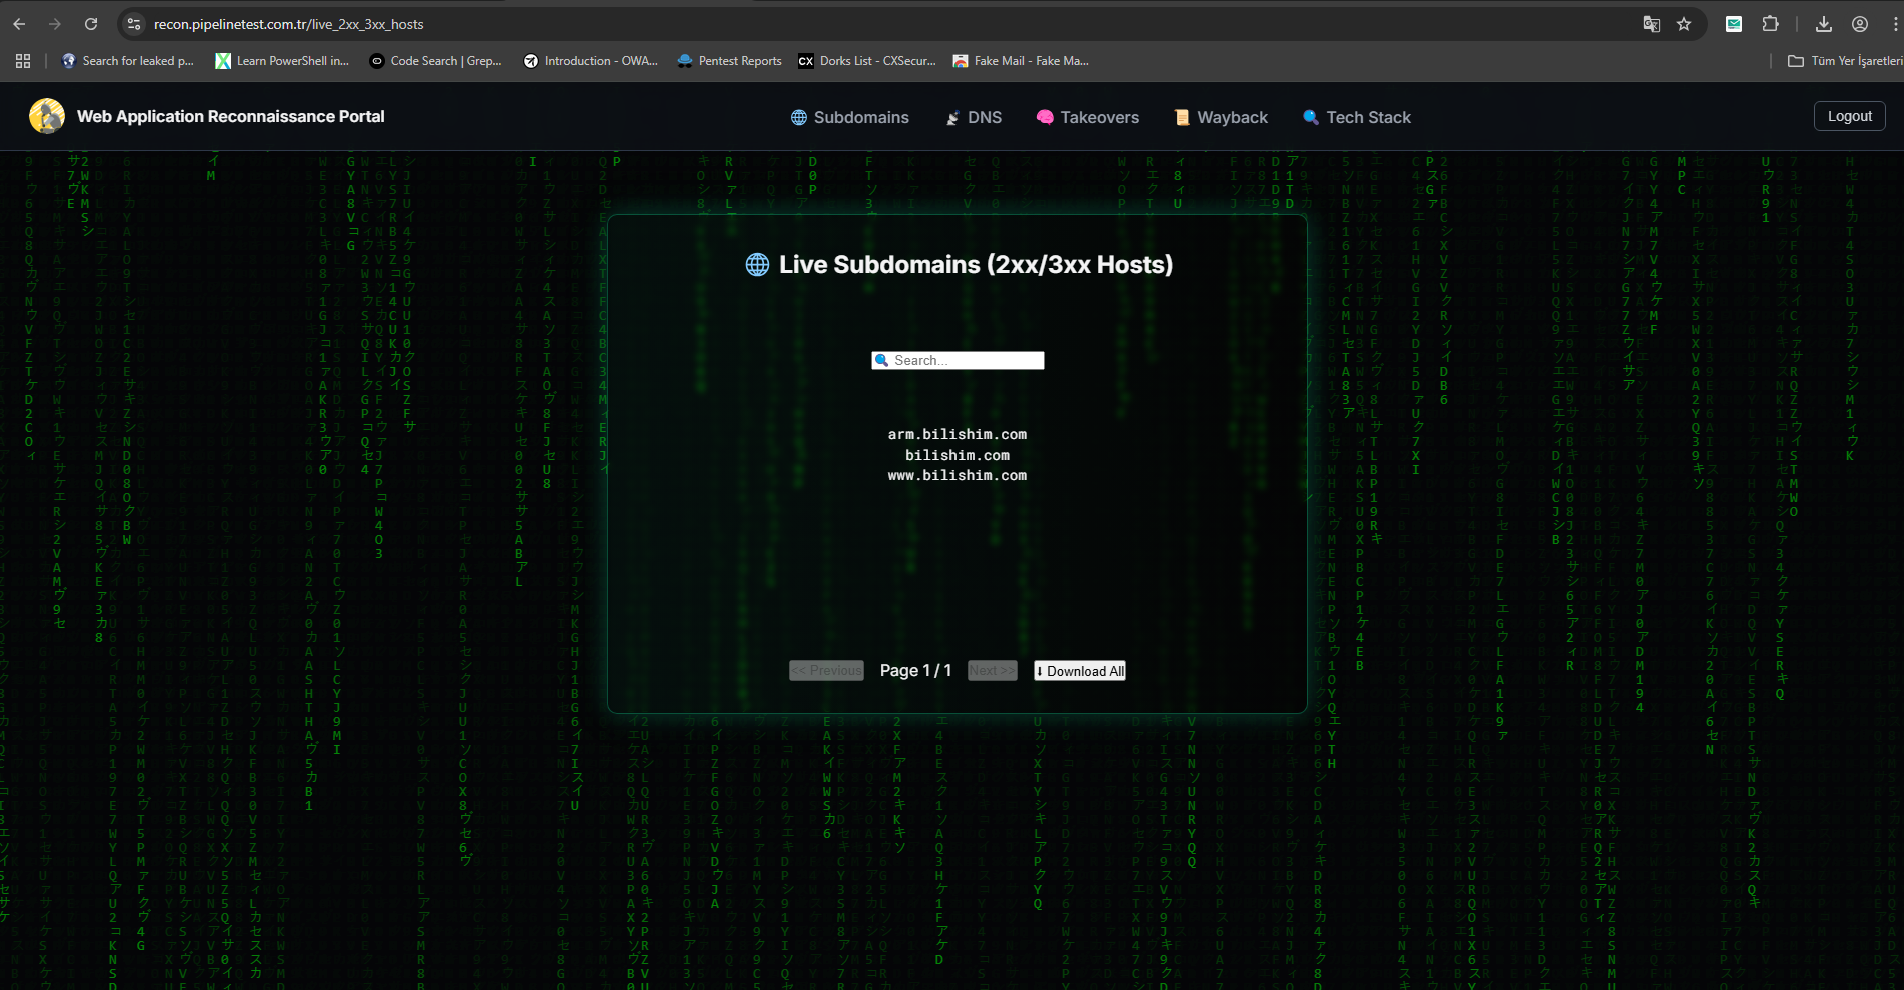
3) Live Host Discovery Page
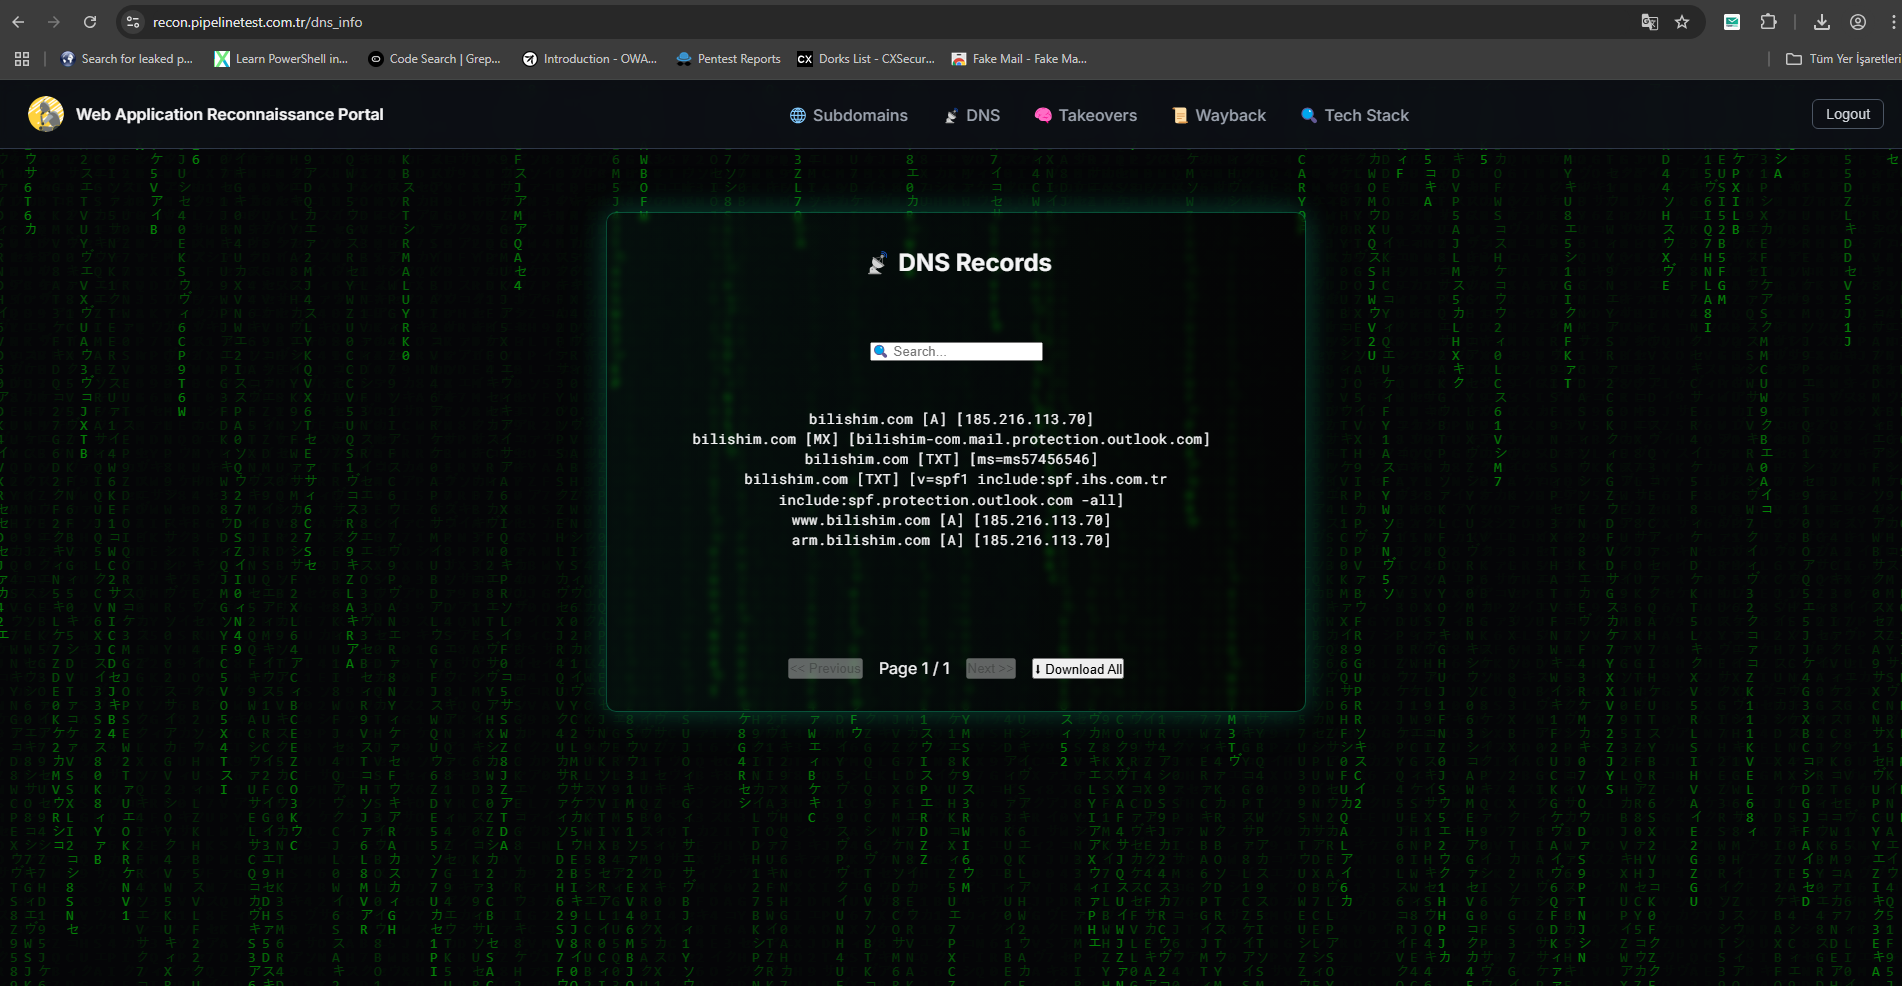
4) DNS Records Page
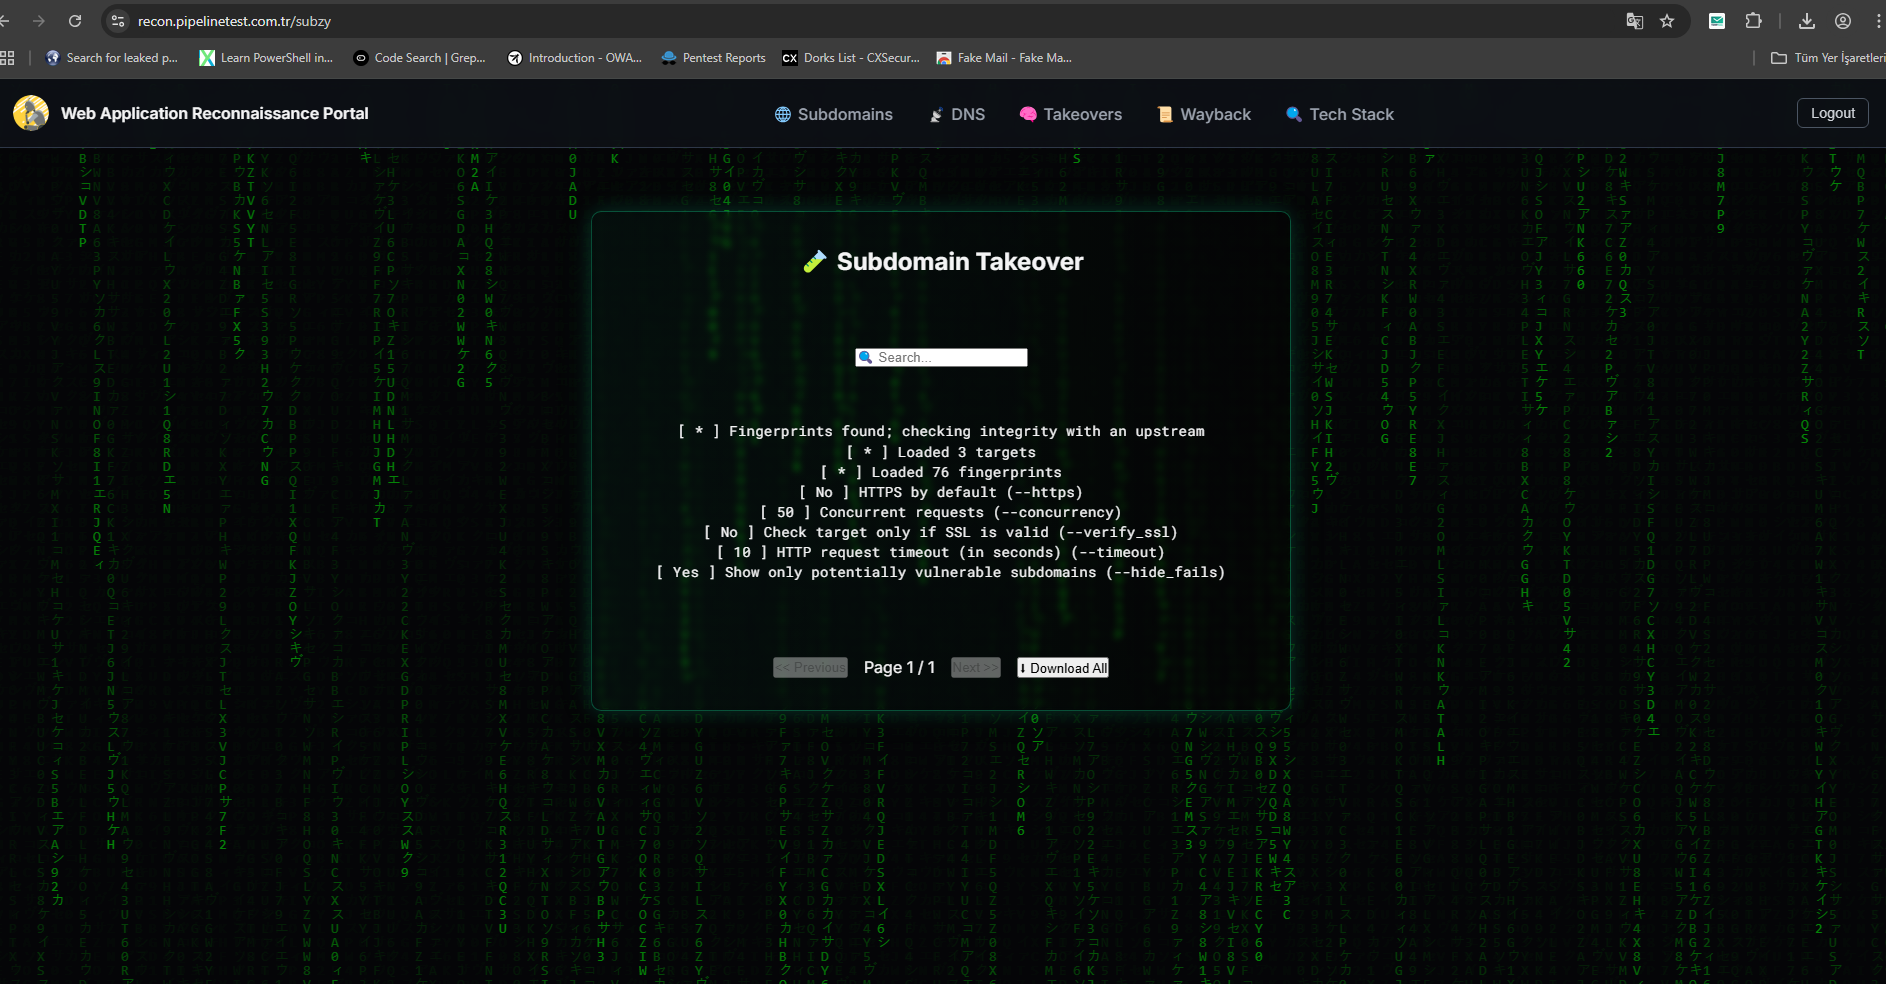
5) Subdomain Takeover Checking Page
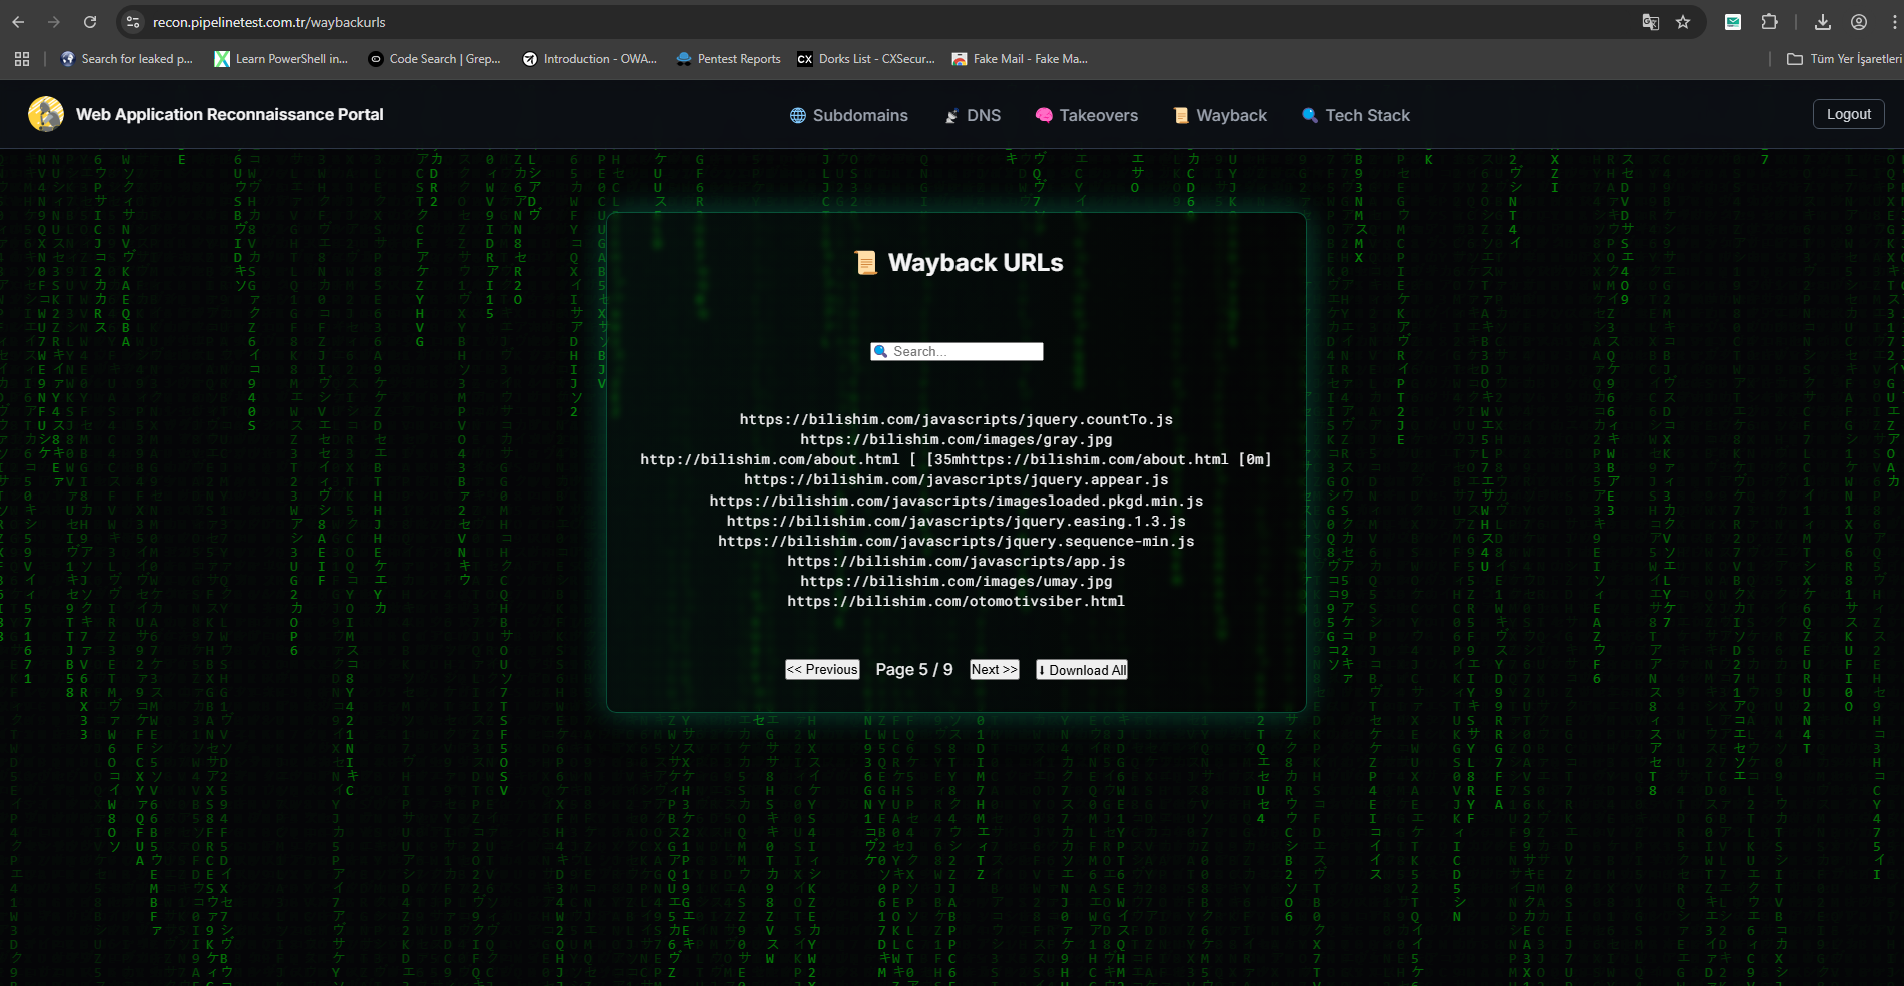
6) Waybackurls Records
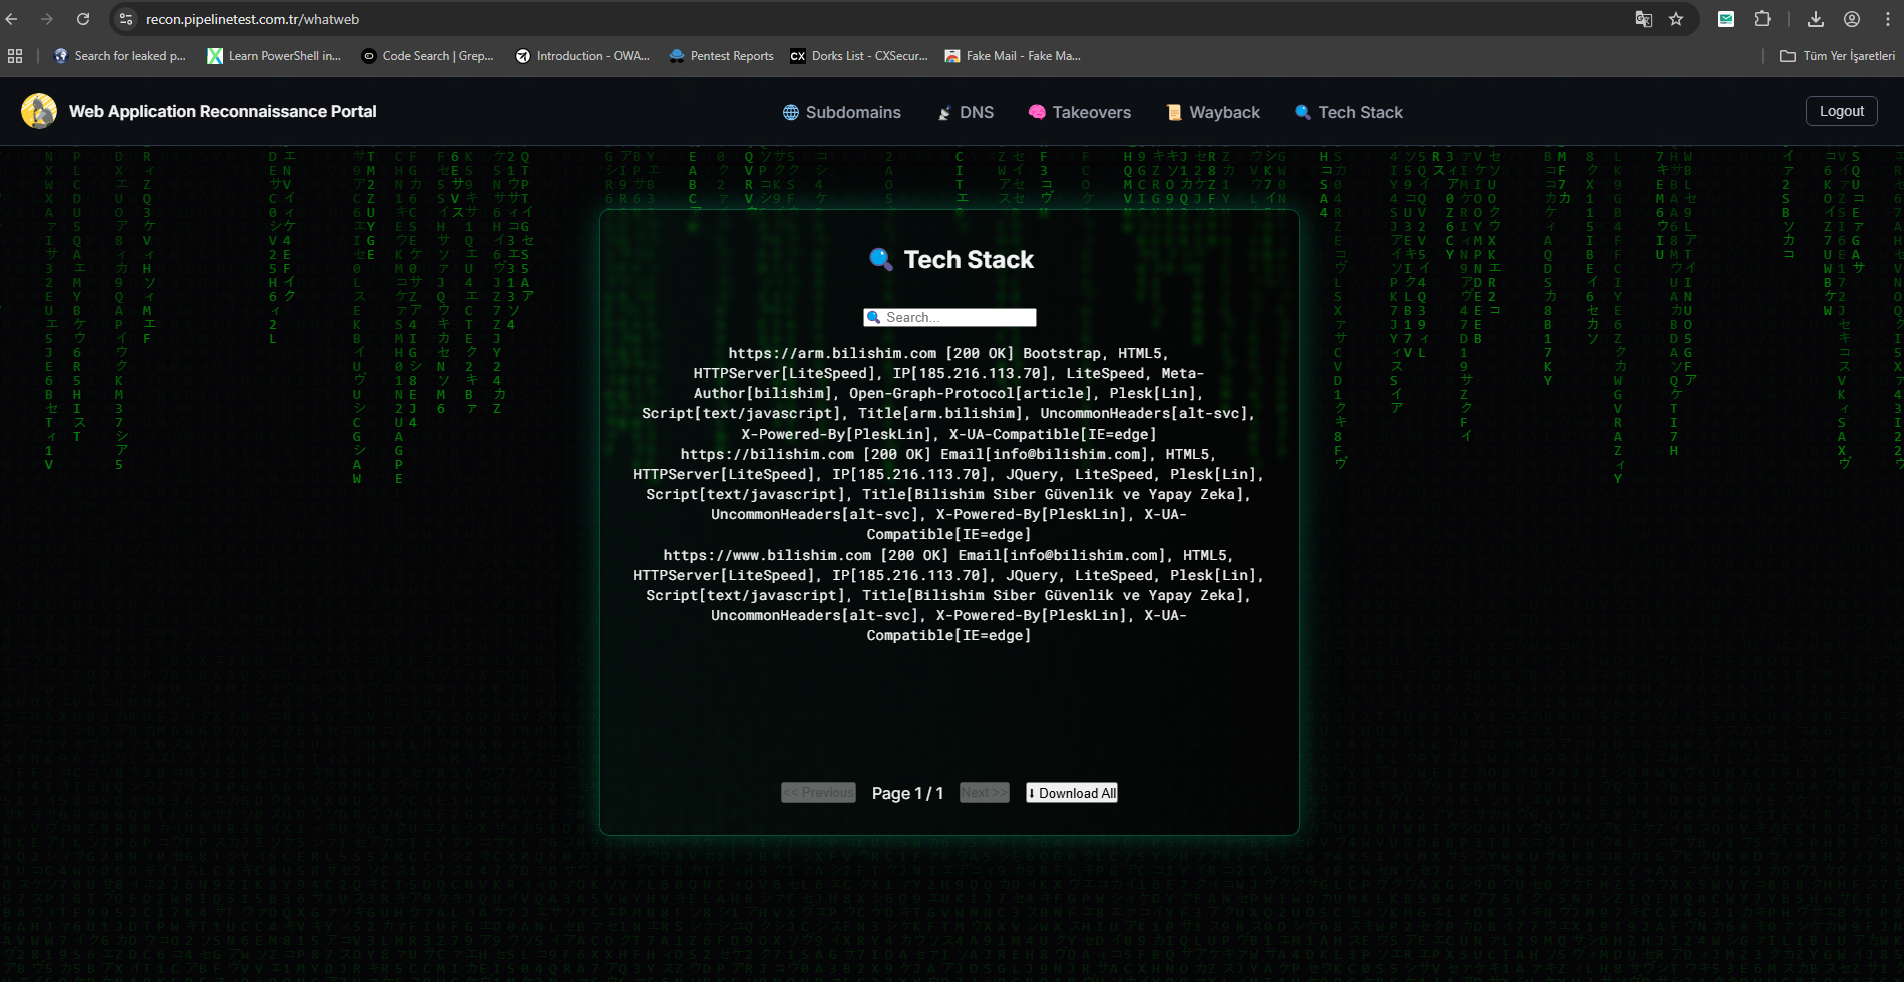
7) Tech Stack
🚀 Features
-
✅ Subdomain enumeration using subfinder + assetfinder
-
✅ Live Host Probing (2xx/3xx) via httpx
-
✅ Wayback Machine URL retrieval with waybackurls
-
✅ Tech Stack Fingerprinting using whatweb
-
✅ DNS Record Collection (dnsx)
-
✅ Subdomain Takeover Analysis (subzy)
-
✅ URL Categorization via gf (XSS, SQLi, LFI, IDOR, etc.)
-
✅ Categorization on both Wayback URLs and Live URLs
-
✅ HTML Report Generation (with Pagination + Search)
-
✅ Authenticated Flask Dashboard (Session-Controlled)
-
✅ Matrix-Style Animated Background (Dark Theme)
🛠️ Technologies
- Python (Flask) – Web interface and session logic
- SQLite – Secure user credential storage
- JavaScript – Pagination, auth, matrix animation
- Docker – Runtime environment
- GitHub Actions – CI/CD workflow execution
- Self-hosted Runner – Volume-mounted deployment
📦 Docker Image
A lightweight, prebuilt Docker image optimized for passive recon and automation.
⚙️ CI/CD Workflow
The pipeline defined in web_app_recon.yml:
- Accepts a domain input (or defaults to
target.com) - Runs passive recon tools in parallel
- Stores output as
.txtfiles underfindings/ - Copies findings into
/output/data/ - Runs
generate_report.pyto create.htmlreports from.txt - Reports become available to the authenticated Flask frontend
🔐 Authentication
-
🔑 Login system secured with bcrypt-hashed passwords
-
🔑 Session expiration after 10 minutes of inactivity
-
🔑 Protected access to all dashboard routes (/dashboard, /live_hosts, /xss_candidates, etc.)
📁 Output Files (Inside /output/)
-
live_2xx_3xx_hosts.html — Active live hosts
-
dns_info.html — DNS Records (A, MX, TXT, CNAME)
-
subzy.html — Subdomain Takeover Detection Results
-
waybackurls.html — Archived Wayback URLs
-
waybackurls_filtered.html — Sensitive Files and Endpoints
-
whatweb.html — Tech Stack Fingerprinting
-
xss_candidates.html, sqli_candidates.html, lfi_candidates.html, etc. — All categorized vulnerability findings
All HTML reports are:
-
Fully paginated
-
Searchable in real-time
-
Styled for dark mode with consistent UI
🧠 Architecture Overview
This system follows a DevSecOps-aligned approach to passive reconnaissance by integrating:
- 🧾 CI/CD-based automation via GitHub Actions
- 🧪 Recon tools for DNS, Subdomains, Tech Stack, Wayback URLs
- 📄 Report generation using Python with pagination & filtering
- 🔐 Session-controlled Flask dashboard
- 🌌 Fully themed frontend with matrix animation and dark mode
🧪 Local Setup
🌐 Reverse Proxy with NGINX
To make the Flask-based dashboard securely accessible via a domain (e.g. https://recon.example.com), you can configure NGINX as a reverse proxy.
This setup allows NGINX to:
- Serve the Flask app on standard HTTPS port (443)
- Handle TLS (SSL) termination
- Forward requests to the Flask app running locally on port
5000
🔧 Example NGINX Configuration
```nginx server { listen 80; server_name recon.example.com;
# Redirect all HTTP to HTTPS
return 301 https://$host$request_uri; }
server { listen 443 ssl; server_name recon.example.com;
ssl_certificate     /etc/ssl/certs/recon.example.com.crt;
ssl_certificate_key /etc/ssl/private/recon.example.com.key;

location / {
    proxy_pass         http://127.0.0.1:5000;
    proxy_http_version 1.1;
    proxy_set_header   Host              $host;
    proxy_set_header   X-Real-IP         $remote_addr;
    proxy_set_header   X-Forwarded-For   $proxy_add_x_forwarded_for;
    proxy_set_header   X-Forwarded-Proto $scheme;
} }
```bash
1. Install Flask and dependencies
pip install flask flask-session bcrypt
2. Create user database
python db.py
3. Run the Flask app
python app.py
4. Access dashboard:
http://localhost:5000
🚪 Disclaimer
- This platform is strictly designed for passive reconnaissance.No brute-force, active exploitation, or intrusive testing is performed by this project.
🤝 Contributions
- Contributions and suggestions are welcome!
- Help me to improve this passive recon CI/CD approach for modern DevSecOps pipelines.
⚠️ This project focuses solely on passive reconnaissance. No brute-force, fuzzing, or active exploitation is performed by design.
Made with ❤️ for Offensive Security and DevSecOps excellence.